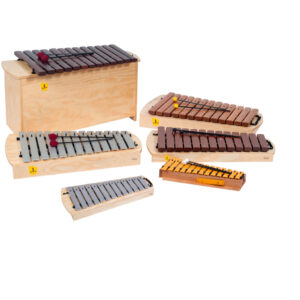
How to Care for Barred Instruments — Part 2

Inventory & Organization

Now that your instruments are clean, it is time to take a closer look at their overall condition. I recommend taking a thorough inventory and labeling each instrument. Involve your oldest music learners in this process!  

I use an editable version of this chart when looking at the instruments in my classroom: 

VoicingTypeLabelPurchasedFundsMissing
Parts
Notes
SopranoXylophoneSX12017MYA grantNoneSonor 49 compact; SG1000
AltoMetallo-
phone
AX4Unknown; present in room when I began teachingUnknownF# (lower octave), Pin between G and ATubing is worn; significant scratches on the exterior
BassContrabass BarCBB-A2014PTONoneNone
SopranoGlockenspielSG7 Unknown; present in room when I began teaching UnknownNoneQuite tarnished, but in good shape overall. Stickers on C and G.

Voicing  

  • Note the instrument’s voice type: soprano, alto, tenor, bass, contrabass, etc.  
  • Most contemporary classroom instruments are just one and a half octaves — however, some older instruments and the tenor/alto models by Sonor have two octaves.  
  • For the two-octave instruments, I recommend labeling using the lowest note. 

Type  

  • The instrument’s material is an easy way to determine the type.  
  • Xylophone: Bars are wood or fiberglass (can have a wood grain or might not).
  • Metallophone: Bars are metal. 
  • Glockenspiel: Bars are metal, but the instrument is significantly smaller than the xylophones or metallophones.  

Label  

Bars and boxes can get separated when instruments are borrowed by another school, used for a conference, or even just moved to the gym for a concert/ informance. Bars can easily get mixed up when students use them in class.  

  • Label the instrument body and bars. This way if — they get separated, matching them up is easy.
  • I use the first letter of the voicing (S/A/T/B), followed by the type of instrument (X/M/CBB/G), and the number (above, SG7 indicates that this is the seventh soprano glockenspiel in my classroom).  
  • A quick note: I label my contrabass bars with a tiny difference. Instead of labeling them with numbers, I use the pitch letter it plays. 

I recommend labeling your barred instruments immediately after they are purchased. If that is not possible, do your best to match the bars with ones that have the same graining and coloring, as most manufacturers tune the bars specifically to each other. 

Purchased

  • Note the year of purchase, if known, to track the instruments’ ages.  
  • I enjoy telling my administration that I have an instrument that is 25+ years old! This information also comes in handy when asking for funding. 
  • I write “unknown” if the instrument was in the school before me. 
  • Occasionally it is possible to track down the instruments’ ages by asking your office professional if you can see old music room purchase orders. However, most districts do not keep these records for more than seven years. 

Missing Parts  

  • It is essential to know if your instruments are missing parts.  
  • Locate accidentals – ordering replacement bars is sometimes possible if the instrument is not that old. 

Notes

  • Last, I make sure to mention any surface damage like scratches or stickers 
  • Note the tubing condition, the underside of the bars, and broken or missing or the pins between the bars.  
  • Ordering replacements is much easier when you have this information gathered. 
  • I also recommend listing the brand of the instrument, if known. Again, it makes ordering parts much more manageable. 

I have found my older students enjoy helping with this process. Charting is a great way to empower your older students’ learning and observational skills. Have them compare notes from year to year to see if they agree with the previous year’s missing parts/notes section, then have them and track any new wear and tear.  

Just make sure you give the kids hard copies to edit and do the online editing yourself, so your data doesn’t mysteriously disappear! 

Now that your instruments are cleaned and inventoried, it is time to purchase and replace the missing and broken parts. Part three — How to Care for Your Barred Instruments: Finding Funding will help you brainstorm ways to funds to keep your instruments in tip-top shape!

How to Care for Barred Instruments – Part 2 was originally published as a Teacher Toolbox article on August 25, 2021.


Shop This Article

Contributor

Kristin Berger

Kristin Berger is a general music teacher at an elementary school in Ann Arbor Public Schools, in Ann Arbor, Michigan. She holds degrees in Music Education (BS), Vocal Performance (BA), and Secondary Education (M.Ed) from Xavier University in Cincinnati,…

Discover more from Kristin

Leave a Comment

Hello (not ? Log out)

Your email address will not be published. Required fields are marked *

We are glad you have chosen to leave a comment. Please keep in mind that comments are moderated according to our comment policy